
 Issue #104 - Back to Death Valley, California A long, flat playa lies hidden at thirty-seven hundred feet in the Cottonwood Mountains, on the western side of Death Valley. When you reach the end of the pavement at the north end of Death Valley, it’s still a sixty-mile roundtrip to the Racetrack, requiring a high-clearance four-wheel-drive vehicle. As you follow the dirt road along the west side of the flat playa, you’ll see a few small rocks scattered across the surface. These are the famous “moving rocks.” During rare wet winters in this part of the high desert, the playa surface floods and freezes. Strong winds blowing up from the Saline Valley to the west or down from the north, actually move rocks across the playa surface. The strongest winds blow up from the Saline Valley and cross the southern end of the 2.8-mile long lakebed.
You can find more information on Back to Death Valley in Issue #104 Page 7 of Photograph America Newsletter. 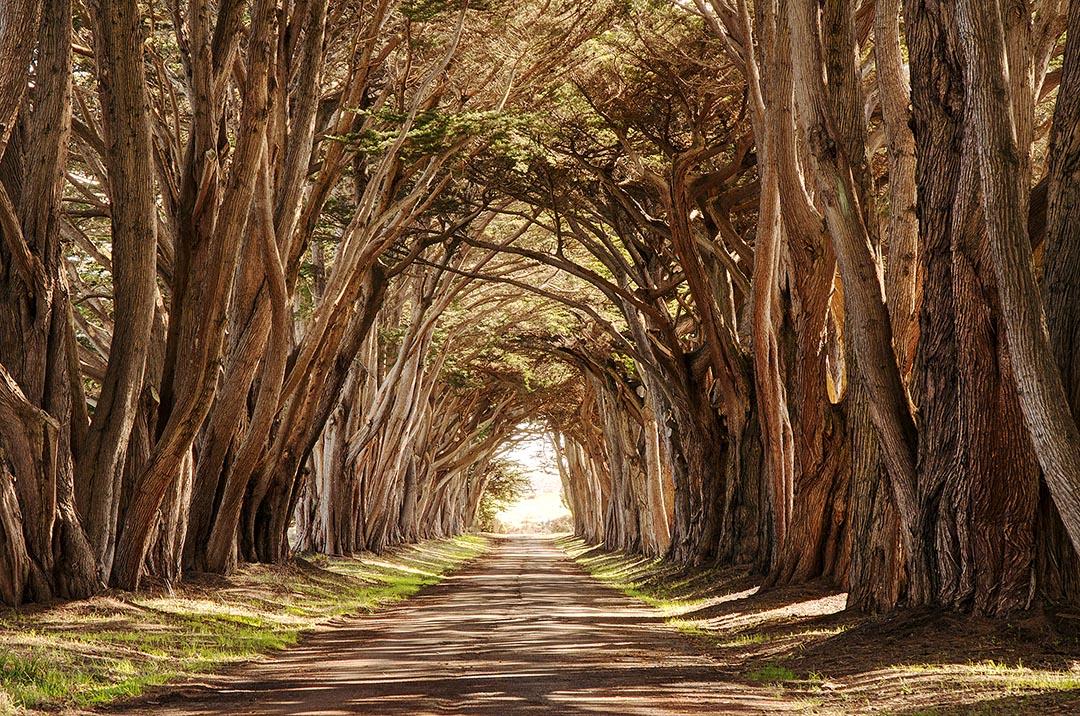 Issue #087 - Point Reyes in Winter, California When driving south, along the road to the lighthouse, watch for the sign marking the right turn to the historic Marconi Trans Pacific Radio Communication Station. The long, straight drive to the facility is lined with large cypress trees creating a tunnel. It makes a great photo in the fog.
You can find more information on Point Reyes National Seashore in Issue #87 Page 8 of Photograph America Newsletter. 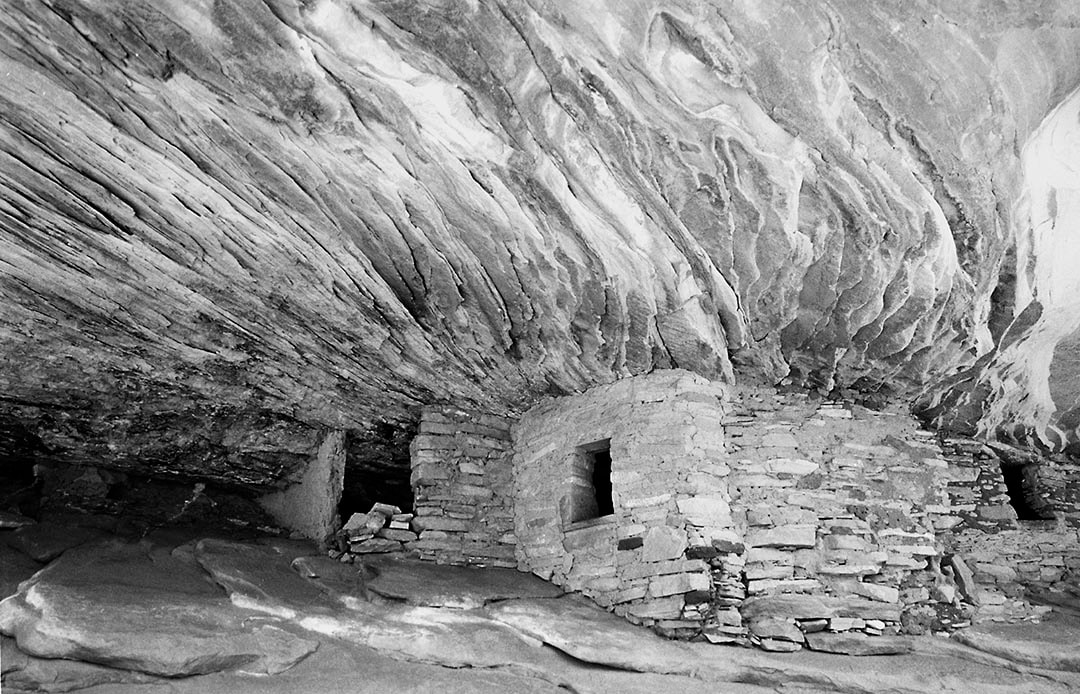 Issue #077 - Two Weeks in the Desert, Utah A few miles east of Utah’s Natural Bridges National Monument, on Highway 95, is a marked side road at the Mule Canyon Visitor Center. This place has a large parking lot, some restrooms, and a short, paved trail leading to several restored Anasazi ruins. This is NOT where you'll find the ruin in the photograph above. That will take a little walking. If you return to the pavement of Highway 95 and drive a quarter-mile east to an unmarked dirt road heading north you won’t need a 4x4 to drive a third-of-a-mile to a wide spot along the road crossing the east-west wash called the South Fork of Mule Canyon. Park here along the road and follow the trail down the west side to the trail register box in the canyon. The trail is easy to follow as it heads west, up the canyon, crossing and recrossing the stream bed for about twenty minutes, or three-quarters of a mile. The real Mule Canyon ruins are located on the right side of the trail. A side trail leads up the slope to the base of the ruins. The ruins are twenty feet above the stream bed and are easy to reach with no rock scrambling.
Please do not touch the walls. The ancient structures are fascinating but what makes this short hike worthwhile are the multi-colored layers of stone creating the “flaming ceiling” of the deep alcove above the ruins. You can find more information on Mule Canyon Ruin in Issue #77 Page 11 of Photograph America Newsletter. 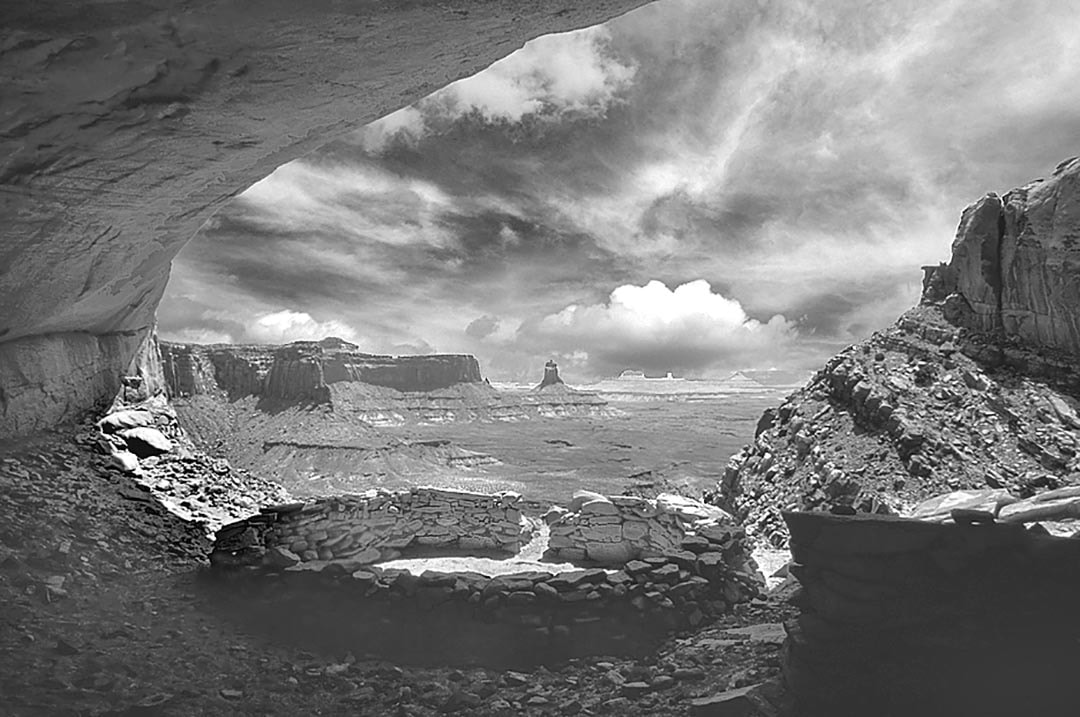 Issue #035 - Canyonlands National Park, Utah Along the road out to Upheaval Dome are some Anasazi ruins that are well-hidden in a deep alcove, high on the vertical canyon wall above Holeman Springs Basin. The trail to this ruin is not marked and is not found on any maps of the park. The “trailhead” is located along the road to Upheaval Dome. The route is steep, rocky, and unmarked but the view from the back wall of the alcove is spectacular. In the distance are Candlestick Tower, Turks Head, and Ekker Butte. You will need an extra wide-angle lens and try HDR exposure techniques. This is a wonderful location for a sunset photograph but it can be difficult to climb out of the ruin and follow the faint trail back to the paved road in the dark–even with a flashlight. Anyone with acrophobia will not want to attempt this trail. Instead of wandering about the area looking for the ruin, ask the ranger at the Island in the Sky Visitor Center for directions to False Kiva.
You can find more information on Canyonlands False Kiva in Issue #35 Page 12 of Photograph America Newsletter. 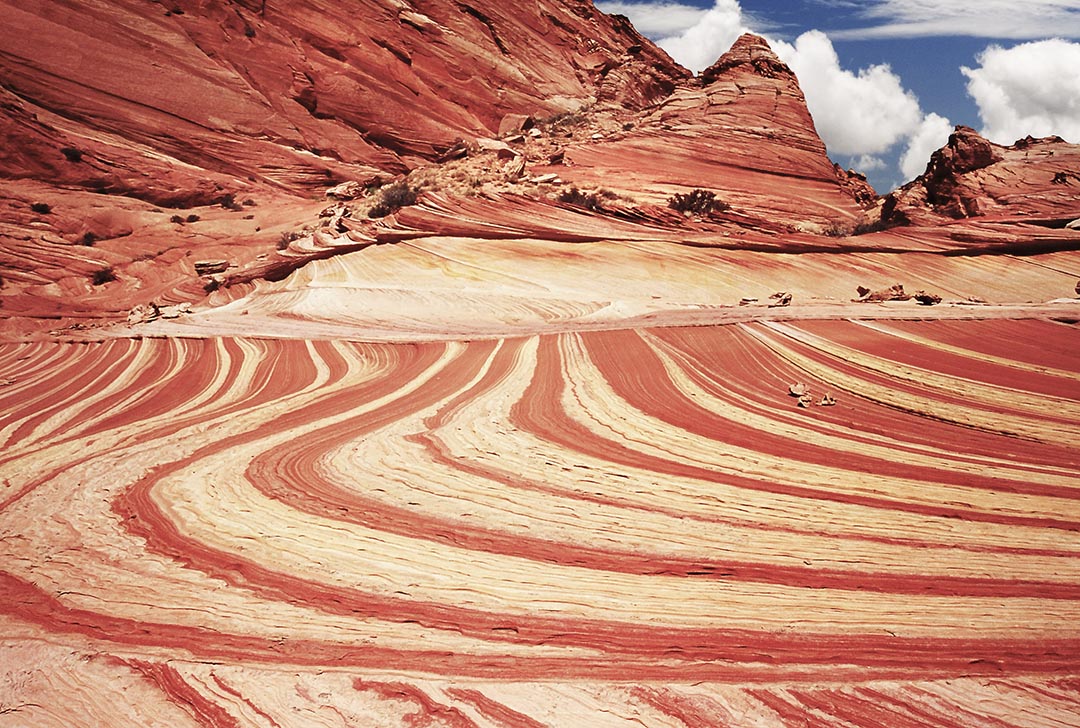 Issue #099 - Successful Desert Photography When you’re hiking the trail to The Wave, and you reach the point where you can see the easiest route down and across the deepest part of the basin (across the sand) and up into The Wave, keep going south and stay on the western edge of the slick rock. In about a quarter mile, the route narrows, with a low, vertical wall rising on the left and a tall and steep redrock wall on the right. Continue walking south, past a strange pattern of concentric circles about three feet in diameter. As the route starts to turn left and slopes down into the wash, the trail passes a large area of red and white stripes (in this photo), bisected by more stripes running north and south to create another dramatic desert pattern. This slick rock formation bears east and drops into the main wash down the center of the North Unit of Coyote Buttes. To reach The Wave, head left and walk north, down the sandy wash, following the bottom until you reach a drop-off that’s too steep and deep to safely descend. At that point, climb up the sandy slope to the right until you reach the southwestern opening into The Wave. This route takes about thirty minutes longer than following the most direct route to the Wave but you will discover many more interesting patterns along the way.
You can find more information on Successful Desert Photography in Issue #99 of Photograph America Newsletter. |